Graphics and Distortions ::pe SM::
The Graphics and Distortions library by Sasha Milica contains emitters from two basic
categories: those that are intended to be used as elements in motion graphics projects,
and those that need to be used on a movie or image and seem to "distort" or "enhance" the movie or image
in interesting ways.
Sasha uses the "emit at points" feature to get very unique results -- this is a powerful
technique that opens up a lot of possibilities.
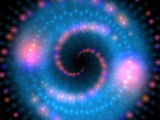
Flash Ring Spiral

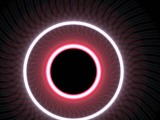
A growing spiral of glowing blue and pink dots.
This emitter is interesting as-is, but becomes more useful with 2 modifications and the correct placement on the stage.
Try placing the emitter at one of the corners of the stage (such as lower right), then scale the emitter
"zoom" property by 300% (r-click the graph window, select "scale", then scale the y-values by 300%). Since this
is a circle emitter, you also need to scale the emitter "radius" property by 300%. Then let the emitter
go for at least 300 frames.
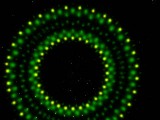
Flash Ring Sparkle

A variation of the first emitter, but "flashes" new particles around the ring instead of slowly spiraling them out.
This emitter again looks better if zoomed up and placed near the edge of the stage. A nice variation can be made by
just changing the particle shape to "Sp19" (do this on the "change shape" page of the emitter properties dialog).
Another is to make the particles non-intense (uncheck the "intense" property
in the emitter properties dialog) and change the particle shape to "Sp18".
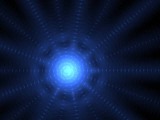
X-Ray Beams

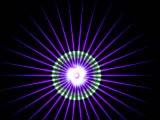
Blue "rays" of dots slowly move out from a central circle.
A nice effect that takes a while to get going. You may want to try setting the "preload" frames value higher, but
that sometimes causes a "gap" in the particles when playback is started. The only way to avoid this is to
"throw away" the first frames (which can be many frames) until the gap is no longer visible.
This is an effect that can change drastically when the framerate of the project is changed. Try setting it to 25 fps and
compare the results to what it looks like at 30 fps.
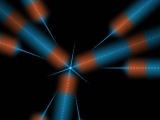
Gear Beams 01 (25 fps)

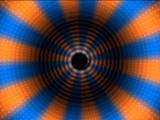
A variation of the "beams" emitter, this one uses orange and blue dots.
If not used at 25 fps, this will not look the way the designer intended. Nice variation: change to "Basic Blur" particle
shape. Another nice one: reduce particle type "life" to 70 (or whatever value you like) with the original particle shape.
Increasing the particle velocity does not make the particles move faster, unless you only increase it slightly. It's
a change in the "size over life" graph or "life" that will make them move faster. This emitter uses "keep particles in order"
but you can probably turn that off to conserve memory.
Gear Beams 02

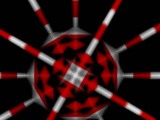
Another "beams" variation with red and white particles forming what looks like pipes coming out of a central geometry of some kind.
This one will also give different results at 25 and 30 fps. Takes a long time to form, so you may want to set the "preload" value
to something pretty high -- 400 or more. This emitter has a little bit of "flicker" due to redrawing -- try increasing the
emitter "size" property to smooth things out a bit.
Scale up the emitter "zoom" property, and the "radius" by the same factor so this emitter is nice and big, and you
will probably hypnotize yourself watching it.
Flash Ring Pulse

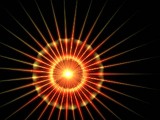
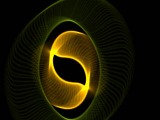
A nice star-shaped emitter that pulses between orange and "hotter" yellow.
The "flashing" occurs in a very interesting way: via the particle color gradient. The color option is "Use next key color",
and changing the "Number of each color" value changes the flashing speed. Change it from 200 to 100 to flash twice as fast;
change it from 200 to 400 to flash 1/2 as fast.
You can probably uncheck the "keep particles in order" option for this emitter to conserve memory.
Flash Ring Spin

A similar star-shaped emitter whose center "spins" instead of flashing.
If you want to change the rate of spin of the center... you can't. At least, I can't tell you how to, since
I'm not sure how it happens.
I can tell you how to make a cool variation of this emitter though. First, scale the "radius" and "zoom" properties
by 300% or so. Then, change the particle type to "Sp19", and adjust the Reference Point so it is in the left corner of
the image (you will need to click the "zoom out" button in the Reference Point Dialog).
Flash Ring Shine

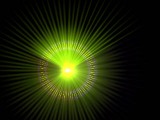
Another star-shaped emitter that flashes "light rays" at a relatively quick speed.
This is a great effect for impact, but you may want to use as a "one-time" flash instead of a continuous
flash. You can easily do this by selecting the emitter "number" property in the hierarchy, moving to frame 28 or so
then typing "N" (this is the "numeric" entry feature). The current value of 1% is showing, so just hit Enter (or Return).
Now hit the right arrow key to move to the next frame, hit "N" again, type "0" (zero) and hit Enter (Return).
What you've done is stepped the "number" property down to 0 at some frame, which causes no more particles to be
created after this point. This will work to "turn off" most emitters.
This emitter also uses "Keep particles in order" and it probably doesn't need to, so you can turn it off to
conserve memory.
I suggest experimenting with the reference point placement on this one -- move it far away from the center for a spastic
effect (you'll have to zoom out a couple of times).
Flash Ring Hypno

Pulsing concentric rings grow then shrink back toward the center point.
A nice variation is to change the "emit at points" value to 200, then select the "Sp19" particle shape.
This emitter (and any other emitter that uses only "intense" particles) can have the "keep particles in order"
option turned off, most likely. There are some exceptions though, so if you think that turning this option off
changes the look of the emitter (for the better), turn it back on. Turn it off whenever possible though to
conserve memory.
Although upon further investigation, this emitter uses "single" particles, so "keep in order" won't use more
memory in this case.
Flash Ring Warp

A nice growing, shrinking, and rotating "warp" effect.
Experiment with reference point placement for this emitter -- closer to the center results in less movement. Also try changing
to a different particle shape -- "Sp19" is nice.
It may be obvious, but changing the particle type "spin" from negative to positive (or vice versa) will reverse the spin
direction.
Digit Column

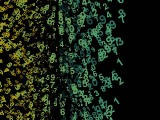
A seemingly 3D upright column of digits rotates.
This emitter will not preview correctly until you click in the preview window, or show correctly on the stage until
the stage redraws after adding it.
An amazing 3D effect to this one, and it looks great with other particle shapes too. After changing the shape,
you may need to change the location of the reference point (if the new shape doesn't have the same dimensions
as the old shape).
"Keep particles in order" is essential for this emitter.
Bicolor Spiro

A blue and orange spiral with an organic, "coiled" look.
This emitter will not preview correctly until you click in the preview window, or show correctly on the stage until
the stage redraws after adding it.
The spiral will eventually fill the entire screen, so if that's the effect you want you may need to increase
the "preload" value. Setting it too high will result in a performance hit when working with this emitter though
(because it creates a lot of particles).
You can change the density of the spiral pattern using the "emit at points" value. One variation that looks good and
will really increase performance is to reduce "emit at points" to 50, then increase emitter "size" to 200% or so.
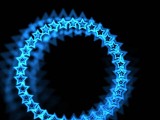
Star Circle

Growing stars progressing around a circle.
This emitter will not preview correctly until you click in the preview window, or show correctly on the stage until
the stage redraws after adding it.
The "emit at points" value controls the number of stars in the circle (won't reset after changing until you click in the preview).
This emitter can be more interesting if positioned so the circle is partly out of the stage area. Also try making it an
ellipse instead of a circle (r-click on the emitter in the stage and "make ellipse"), making one radius larger than the other
to stretch the ellipse, then change the emitter "angle" to rotate it somewhat.
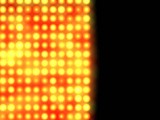
Spot Wall

A grid of "light bulbs", glowing brighter in waves that move down the grid.
This effect is created by laying many copies of dim particles on top of each other, which explains
why a relatively large "preload" value must be used (350).
To make the bright "wave" move more quickly down the grid, decrease the emitter "life" property. This
will also increase performance.
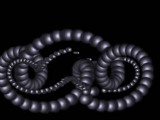
3D Ring Rotate

An Escher-like 3D "pretzel" that rotates infinitely. Where does it begin and where does it end?
This emitter takes a long time to reach the point where it forms a complete "pretzel", hence the quite large
preload value (and the corresponding delay when doing anything with this emitter). Unfortunately when added to the
stage, this emitter also shows the "gap" problem (due to a bug in the "emit at points" with non-zero preload values).
Therefore you will need to "throw away" the first few hundred frames until the gap disappears -- to increase performance,
set the preload frames to a lower number, even zero (since you'll be throwing those first frames away anyway).
Although a very unique emitter, you may question its usefulness at first. There are some minor changes that you
can make to it to make it more useful (in my opinion). First, scale the "y radius" graph so the ellipse is closer to
a circle. This immediately makes the effect less "crazy", but it still rotates pretty quickly. Slowing it down is not
intuitive: you need to decrease "number" and "spin", then increase "life" inversely. For example, scale the particle
type "number" and "spin" by 50%, then scale the particle type "life" by 200%. This changes the look of the emitter of
course, so experiment.
To add some color, just increase the "tint strength" to 100% then select the tint color you want.
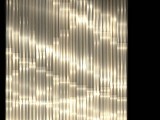
Strip Waves

Looks like hanging metallic stips that have light patterns moving across them.
Meant to be positioned below the bottom edge of the stage. To change the width of the strip, change the emitter "width" property,
then either adjust the particle type "size y" value to compensate for the width change, or the "emit at points" value to
add or remove strips.
Changing the particle shape to "Sp19" or "Basic Blur Darker" creates nice variations. To change the speed of the light patterns,
decrease the emitter "number" property -- you may want to increase the emitter "life" property to compensate for fewer particles.
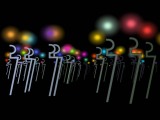
Graphic Crowd

An abstract graphic representation of a moving crowd.
Has a nice pseudo-3D "depth" effect, although there will be an occasional "person" that appears out of order.
To slow down the "people", decrease the "f-velocity", but then you'll want to increase "f-life" to compensate, but
that requires a decrease in "f-number" too.
A note about this emitter, and other super emitters that use "single" particles. There is a bug in particleIllusion
that doesn't kill "single" particles when the free emitter they are attached to dies, but it does add a new
"single" particle when the free emitter is re-used. The end result is that as more and more time goes by, each
free emitter will have multiple copies of each "single" particle, and won't look the same as it did at the start.
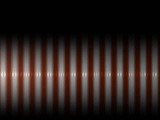
Stripes Bar Pulse

A horizontal row of vertical red and white stripes, that glow in a repeating wave from left to right.
Change the height of the stripes using the particle type "size x" property. If you look at the effect closely, you
can see that a red stripe will turn white on the next pass, and a white will turn red. If you want to prevent this,
change the "Number of each color" value on the particles "color" page to 10 assuming you didn't make any other changes.
You can change this value to change the width of each stripe -- setting it to 20 makes the stripes twice as wide.
Note that you should stick to multiples of 10, although not every multiple works -- it's related to the "emit at
points value".
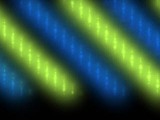
Striped Bar Rolls

Angled stripes of yellowish-green and blue bars move left to right, while vertical rows of highlights move up the stripes.
At first this looks like simple stripes, but upon closer look you realize the stripes are made up of other stripes that are
moving in a different direction. Because of this complexity, this emitter can be a performance killer.
Use the "f-life" property to change the height of the stripes. Reverse the direction of the stripe motion by changing the
emitter "angle" from 0 to 180. Some nice variations can be made just by changing the
first "emit at points" value -- higher values result in a higher stripe density.
Vertical Blur Large

The first of the "distortions" emitters, which will only product results when used on an image (or image sequence or movie) because
the particles use the "get color from layer" option.
This emitter consists of a horizontal row of densely-packed thin vertical streaks that appear to "blur" the image.
To use this emitter effectively on a still image, it must move vertically over time. As it does move, it appears to "stretch" and "blur" the
portion of the image it overlays. You can increase the particle type "size y" property slightly to intensify the effect.
For a variation, try changing the particle angle (on the "particles" page of the emitter properties dialog) very slightly -- change it
one degree at a time by typing the value. At low values (2, 3, etc.) an "interference pattern" of sorts appears, adding what seems to
be dark underlying rows.
Vertical Blur Medium Light

A variation of the previous emitter, but smaller and brighter. It also must move vertically over time to be effective on still images
or movies where not much change is happening.
With this emitter (and the previous one) you can change the "density" of the vertical streaks using the "emit at points" value
together with the emitter "height" (height instead of width because the "angle" is set to 90 degrees). Set the "emit at points" value
to the same value as the "height" to get 1 particle per pixel.
Increase the intensity of the effect by increasing the "size y" value.
Horizontal Blur Small

A smaller, vertical version of the first emitter, it must be moved horizontally to have an effect on still images or movies
where not much is happening.
Increase "size x" to make the streaks larger, and increase "size y" to intensify the effect.
Pebbled Glass

This emitter gives a simple look of "pebbled glass" to the underlying image or movie.
If used on a still image or low-motion movie, you may want to animate the position of the emitter a little bit to add
some "shimmer">
This is a nice basic "array" emitter that can be used with various particle shapes to create different looks. For instance,
change the particle shape to "Ball Old" and increase the "size" somewhat to create a "beaded" look.
Triangular Wave

An array of triangular particles "wave" over the grid.
To increase the strength of the "wave", increase the "size x" value, which will stretch the triangles. The emitter "spin" property
controls the wavelength of the "wave" -- higher values mean shorter wavelength and more waves.
Thin Diagonal Blur

Blurs the image with long diagonal streaks.
This effect often does not show correctly in the preview window -- it shows with "seams" in the preview for some reason,
but is "smooth" when used on the stage.
Moving this emitter slightly will add some "motion" to a still image.
Swimming Squares

Small squares rotate, producing a "swimming" effect.
To reduce the amount of "distortion", move the reference point closer to the center of the particle shape.
If having all of the particles spin in the same direction looks too ordered to you, set the particle type
"spin" to 0, then set the "spin variation" to 10 or so. This will result in particles spinning both directions.
Small Digits Array

A grid of closely-packed, small changing numbers.
This emitter has a "black background" particle type added only for previewing. When adding this
emitter to the stage you should delete the "black background" particle type or turn it off (by clicking its
icon in the hierarchy), then turn off the background image
for the layer (using the "bg" icon in the Layers Window) instead. This will increase performance significantly.
To increase the size of the digits, use the "size" property, but you'll also need to adjust both "emit at
points" values to compensate.
For a more "ordered" variation, just uncheck the "random start frame" on the particles page so all of the particles
start with the number "0" and progress from there.
Medium Digits Array

A variation that uses 2 particle types, with the additional one creating the 1/2 digit horizontal offset
for every other row. The digits are larger as well.
Because of this "offset" trick (uses 1/2 the number of "emit at points" rows), this is a more difficult effect to
scale up or down. If you do need to scale it, you may need to adjust the reference point of the "offset number"
particle type.
Also notice that the digits in the offset row change at a different rate -- adjust this with the frame speed slider
on the particles page of the emitter properties dialog.
This emitter has a "black background" particle type added only for previewing. When adding this
emitter to the stage you should delete the "black background" particle type or turn it off (by clicking its
icon in the hierarchy), then turn off the background image
for the layer (using the "bg" icon in the Layers Window) instead. This will increase performance significantly.
Scan Grid Sweep

A grid of intense dots sweeps across from right to left. Can't tell that it's dots until they fade out. This will repeat.
If you want only one sweep across, jump to frame 130, select the emitter "number" property, then type "N" (to activate
the numeric entry function). Just hit Enter (Return) to add a data key at the current value. Press the right arrow to
move to the next frame, hit "N" again, type "0" and Enter (Return). This will stop particles from being created after frame 130.
Radial Rays

A circular "window" that causes the colors at the edge of the circle to radiate outward.
This is one of the best uses of "get color from layer" that I've seen. The emitter is most effective when it is being
moved around.
Animate the "radius" for an "irising" effect. This emitter also works as an ellipse, but when the ellipse gets too thin
the spaces between some of the rays become visible.
